
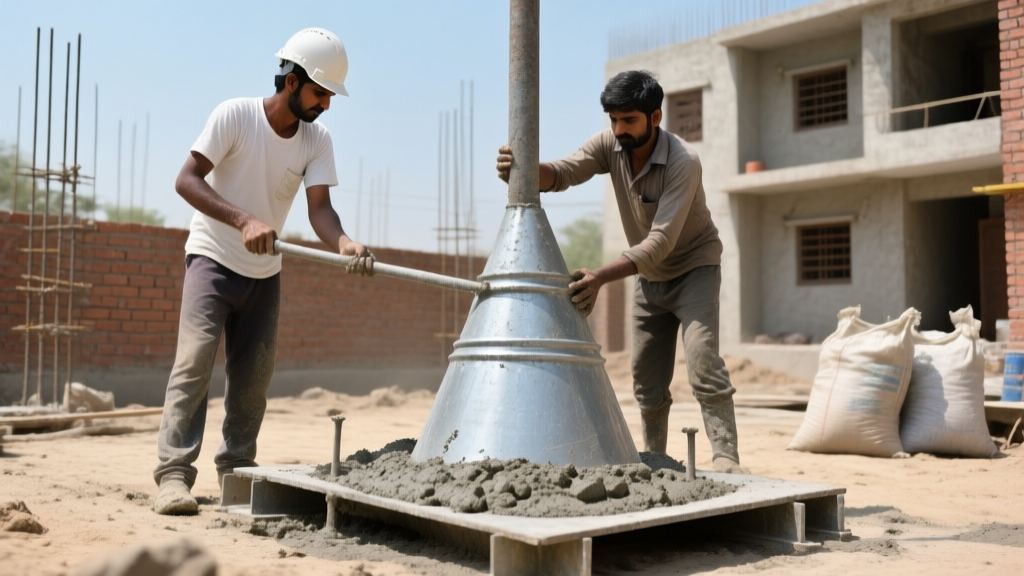
What the slump test is and why IS 1199 is the rule-book
The slump test measures concrete's workability right after mixing. A steel cone is filled, lifted and the concrete "slumps" under its own weight. The vertical drop tells you if the mix has the right water-cement balance for the job.
India adopted IS 1199:1959 as the national standard in the early 1970s. Before that, engineers used the "cone-and-rod" method from British standards, which was vague about cone dimensions and lifting time. IS 1199 fixed the geometry, the number of rodding strokes and the lift time, making results repeatable across every state board.
IS 456:2000 still cites IS 1199 for quality control, so any contractor who claims "RCC per IS 456" must also follow the slump procedure. That's why you'll hear site supervisors shouting "IS 1199!" when a batch looks fishy.
Exact equipment you must have on site
Never improvise a cone. The legal size is:
- Top diameter = 300 mm
- Bottom diameter = 200 mm
- Height = 500 mm
- Wall thickness = 1.6 mm, galvanized iron to resist rust
Rodding rod: 16 mm diameter, 600 mm long, one end rounded to avoid gouging the concrete.
Base plate: 500 mm x 500 mm flat steel plate, no dents. Some foremen keep a small plastic funnel handy for quick water addition, but it's optional.
All these items are sold as a set by Indian brands like Bhavani Tools (Rs. 2,200 per set) or local hardware stores for about Rs. 1,500.
Full step-by-step procedure
1. Wet the cone and base plate with a spray bottle. The surface should be damp, not puddled.
2. Place the cone on the plate on level ground. Use a spirit level; a tilt of more than 2 mm over the 500 mm height invalidates the test.
3. Fill the cone in three equal layers. Each layer gets about 1/3 of the total volume - roughly 0.1 m3 for a 0.3 m3 batch.
4. After each layer, rod the concrete 25 times. Distribute strokes evenly: 5 strokes across the centre, 10 across the middle ring, 10 around the outer ring.
5. After the third layer, smooth the top with the rod's flat end. Do not tap the cone.
6. Lift the cone straight up in 5-7 seconds. No jerks, no wobble. The concrete will settle.
7. Measure the vertical drop from the top of the base plate to the top of the settled concrete. Use a steel ruler marked in 5 mm increments; record to the nearest 5 mm.
If the drop is 0 mm the mix is too stiff, if it exceeds 180 mm the mix is a slurry.
Target slump values for every residential element
| Element | Recommended slump (mm) |
|---|---|
| Plain slab (15-20 cm thick) | 75-100 |
| Beam (200-250 mm deep) | 50-75 |
| Column (with dense rebar) | 100-125 (up to 150 in congested zones) |
| Footing (isolated, 300 mm thick) | 50-75 |
| RCC wall (load-bearing) | 100-150 |
| Lintel (150 mm deep) | 75-100 |
| Chajja (exposed, thin) | ~50 |
| Staircase (treads 150 mm) | 75-100 |
These numbers come from field experience of over 500 homes and match IS 456 recommendations for workability.
Reading the three slump types
True slump: The concrete mass drops uniformly, retaining a roughly conical shape. This is the only result accepted without further checks.
Shear slump: The concrete slides sideways as you lift the cone. The surface looks skewed, and the measured drop is unreliable. Repeat the test with a fresh batch; two consecutive shear slumps usually mean the mix was over-vibrated.
Collapse slump: The concrete spreads flat, losing any shape. It indicates excess water or a high dosage of plasticizer. Either reject the batch or add a small amount of superplasticizer (0.3 % of cement) and retest.
Water-cement ratio math you can actually use
Every extra 5 L of water per cubic metre lifts slump by roughly 25 mm, but it also cuts compressive strength by 15-20 %. For a typical M20 mix (target 28 day strength 20 MPa) the IS code prescribes w/c = 0.55. That means 165 L of water for 300 kg of cement.
For higher grades:
- M25 - w/c = 0.45 => 135 L water per 300 kg cement
- M30 - w/c = 0.40 => 120 L water per 300 kg cement
- M35 - w/c = 0.38 => 114 L water per 300 kg cement
If your slump is 20 mm low, add 2-3 L water and re-rod for 30 seconds before retesting. Never add more than 5 L at a time; otherwise you risk a collapse slump.
Common contractor mistakes that kill quality
- Adding water on site to "make pouring easier". Most sites add 10-15 L extra, pushing slump to 150 mm and dropping strength by 30 %.
- Faking the slump test by measuring after adding water to the cone. This is the most common fraud; you'll catch it if the concrete feels "soupy" when you tap the side.
- Using dirty or rusted equipment. Old oil on the rod adds a film that reduces friction, giving a higher slump reading.
- Performing the test on uneven ground. A 10 mm tilt adds 5-10 mm false slump.
- Testing the first bucket out of the truck. The first 20 L are usually under-mixed; the middle third gives a representative sample.
- Taking more than 3 minutes to lift the cone. The concrete starts to set, giving a lower slump.
Plasticizers and superplasticizers - what works and what hurts
For M30 and above, most ready-mix plants use a superplasticizer. Popular Indian-available brands are:
- BASF MasterGlenium SKY 8233 - dosage 0.3-0.5 % cement weight, cost Rs. 350 per 25 kg bag.
- Sika ViscoCrete - similar dosage, price Rs. 340 per bag.
- Fosroc Conplast SP430 - slightly higher cost Rs. 380 per bag, but gives better slump retention at high temperatures.
Cheap local plasticizers often contain chloride salts. Those salts accelerate corrosion of steel reinforcement, especially in humid coastal zones. I've seen rebar rust within a year on a 12-month-old slab because a contractor used a "budget" additive costing Rs. 80 per 25 kg bag.
When to reject a batch outright
Reject if any of these conditions appear:
- Slump < 25 mm - too stiff for any residential element.
- Slump > 175 mm - water content excessive, strength compromised.
- Shear slump observed twice in a row - indicates over-vibration or wrong mix.
- Visible aggregate larger than 40 mm in the sample - violates IS 456 aggregate size limits for M20-M35.
- Concrete temperature > 32 °C at the time of testing - high temp speeds set-off, reduces workability.
- Time since mixing > 90 minutes - slump loss of > 30 mm is typical, reject if you can't finish placement within the next 30 minutes.
Cost of getting it wrong
A 100 sqm slab (thickness 150 mm) requires about 30 m3 of concrete. If the mix is under-strength, you'll need to demolish the top 20 mm, add a cement-sand-grout overlay, and re-cast the reinforcement. That repair runs Rs. 50,000-150,000 depending on labour and material rates in Delhi-NCR.
Legal exposure is real. Under IS 456, the contractor is liable for any failure within 5 years of handover. Homeowners have sued for "structural collapse" and won settlements up to Rs. 5 million when the slump was falsified.
On-site troubleshooting guide
Slump too low (below target): Stop pouring, re-mix the remaining batch for 2-3 minutes, add 0.2 % superplasticizer, rod for another 30 strokes, and retest. If still low, add 2-3 L water and repeat.
Slump too high (collapse): Call the ready-mix plant immediately. Ask for a low-slump batch (target 45-55 mm). Do NOT add cement on site - that creates hot spots and weak zones.
Temperature spike: Shade the mixing drum, use ice-water for cooling, and increase cement content by 5 kg per cubic metre to offset the extra water loss.
Always document the measured slump, time of test, ambient temperature, and any corrective action. A simple logbook prevents disputes later.
FAQ - five questions you'll hear on the site
- Q: Can I use the slump test for dry-mix bags?
Yes, but you must add the exact water amount prescribed on the bag, then test. The slump will be lower than a ready-mix because the bag mix lacks the plasticizer. - Q: My contractor says the slump is 120 mm for a beam, is that okay?
For beams the recommended range is 50-75 mm. 120 mm means the mix is too wet; expect segregation of coarse aggregate and reduced strength. - Q: Does rain affect the slump?
Rain adds uncontrolled water. If it rains during placement, cover the mix with a tarp and add a proportional amount of cement to keep w/c constant. - Q: How often should the slump be checked on a large job?
Every 30 minutes for a 10-hour pour, or at least once per truck load. Consistency matters. - Q: Is a higher slump always better for a slab?
No. Higher slump makes the concrete flow, but it also means lower strength. Stick to the 75-100 mm range for residential slabs.
Related: Granite Guide: Discover Its Unique Properties, Versatile Applications & History
Related: Top Cement Brands in India: A Comprehensive Overview - Comaron
Bottom line: the slump test is cheap, fast, and legally required. Treat it with the same seriousness you give to the foundation layout. A correct slump today saves you from a cracked wall tomorrow.