
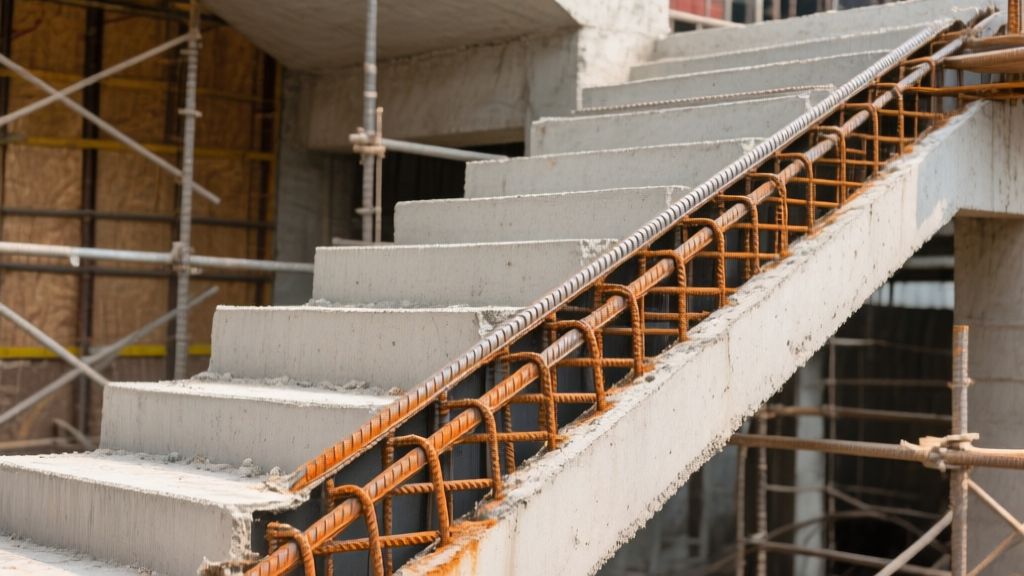
Staircase Reinforcement Basics
The waist slab is the thin concrete slab that runs along the slope of a stair flight. It is different from the tread slab, which is the horizontal slab you step on, and from the riser slab, which fills the vertical gap. The waist slab carries the bending moment generated by people walking up and down, and it also transfers shear to the landing beam or the floor slab above. Reinforcement in the waist slab is therefore the single most important factor for a crack-free staircase.
Back in the 80s most Indian builders used 10 mm bars everywhere, assuming the concrete would take care of the rest. Over the decades IS 456 and real-world experience have shown that a 12 mm Fe-500 bar at the bottom of the waist slab, placed along the slope, is the minimum safe practice for a 1.0-1.2 m wide residential stair. The bar works in tension on the outer edge of the slope and in compression on the inner edge, just like a roof slab.
Why the bottom? The concrete at the bottom of a stair is the most stressed part because the slab is in tension there while the concrete above is in compression. Putting the main bar at the bottom gives the steel the best lever arm. The same principle is used for roof slabs and bridge decks - the steel goes where the concrete is weakest.
For a quick reference on how the waist slab fits in the overall stair geometry, see our Staircase Design for Indian Homes 2026 article. It explains tread depth, riser height and how the waist slab thickness ties into the overall rise-run ratio.
Main Bar and Distribution Bar
The main bar runs the length of the flight, parallel to the slope. For a typical residential stair of 1.0-1.2 m width, the code-mandated size is 12 mm TMT Fe-500. It sits at the bottom of the waist slab, tied with hooks at the start and end of the flight. The bar is tied at 200 mm centres with 8 mm steel stirrups (the "crank" bar at the landing-flight junction is a separate detail).
Distribution bars are the transverse reinforcement that pick up the load from the main bar and spread it across the slab width. IS 456 calls for 8 mm Fe-500 bars at 150 mm centre-to-centre for a 1.0-1.2 m wide stair. They are placed at the same depth as the main bar, i.e., at the bottom of the waist slab, and are tied to the main bar with 6 mm hooks.
When the stair width falls below 1 m, many contractors cut corners and keep the 12 mm bar. In practice a 10 mm Fe-500 bar is acceptable for such narrow interior stairs, provided the slab thickness is at least 130 mm and the cover is 20 mm. For very wide flights (over 1.5 m) or for public stairs that see heavy foot traffic, upgrade to 16 mm main bars and increase distribution bar spacing to 120 mm c/c.
| Waist slab width (m) | Main bar size (mm) | Distribution bar size (mm) | Spacing (mm c/c) |
|---|---|---|---|
| 0.8 - 1.0 | 10 (Fe-500) | 8 (Fe-500) | 150 |
| 1.0 - 1.2 | 12 (Fe-500) | 8 (Fe-500) | 150 |
| 1.2 - 1.5 | 12 (Fe-500) | 8 (Fe-500) | 120 |
| > 1.5 | 16 (Fe-500) | 8 (Fe-500) | 120 |
Corner stairs or dog-legged flights need an extra tie-bar at the change of direction. The main bar should be bent to follow the new slope, and a short 12 mm "knee" bar should be welded or tied to the main bar at the vertex. This prevents a weak hinge that would otherwise crack within a year.
Waist Slab Thickness and Cover Block
IS 456 (Clause 38.1) states that the minimum thickness of a reinforced concrete slab carrying normal residential loads is 125 mm. For stair waist slabs we add a safety margin and adopt 150 mm as the practical minimum. Anything below 125 mm - especially the 100 mm thickness some contractors still quote - inevitably leads to early cracking because the concrete cannot develop enough compressive strength to balance the tensile force in the steel.
In seismic zones IV and V the slab must be thicker to accommodate higher shear forces. The rule of thumb is to increase the waist slab thickness by 15 mm for every 0.5 km from the epicentre, or simply adopt 150-180 mm for any house in Seismic Zone IV/V. This also helps with the ductility demand that the code imposes on staircases in high-risk areas.
Clear cover protects the steel from corrosion. IS 456 recommends 20 mm for interior slabs and 25-30 mm for coastal or wet areas. The extra cover in coastal zones compensates for the aggressive chloride environment that can eat away the passive layer of Fe-500 bars within a few years.
| Span of stair (m) | Recommended waist slab thickness (mm) |
|---|---|
| 0 - 2.5 | 125 - 130 |
| 2.5 - 4.0 | 130 - 140 |
| 4.0 - 5.5 | 140 - 150 |
| > 5.5 (large open-well) | 150 - 180 |
For a typical 3-storey house, the waist slab thickness will be 135 mm for the ground floor stair and 145 mm for the first-floor stair, because the latter carries the live load of the floor above as well. If you are using a local brand like Tata Tiscon or Kamdhenu, the 12 mm bar weighs about 0.89 kg per metre - one bundle (8 pieces) is roughly 7 kg, which is easy to handle on a cramped site.
Lap Length, Development Length, and Crank Bar
Lap length is the length over which two bars are overlapped to develop full tensile capacity. For Fe-500 12 mm bars the code gives a simple rule: 50 d, where d is the bar diameter. Hence 50 x 12 mm = 600 mm. The lap must be staggered - i.e., the first lap starts 600 mm from the start of the flight, the second lap starts 600 mm after the first ends, and so on. Overlapping more than 600 mm does not add strength; it just wastes steel.
Development length (Ld) is the length of bar needed to develop its yield stress from the concrete. The IS 456 formula is:
Ld = (Ï x Ïs) / (4 x Ïbd)
Where Ï = 0.87 for Fe-500, Ïs = 500 MPa, and Ïbd is the design bond stress (â 1.2 MPa for good quality concrete). Plugging the numbers gives Ld â 90 cm for a 12 mm bar. This is close to the 600 mm lap length, which is why the code merges the two concepts for practical use.
The crank bar is the steel placed at the landing-flight junction, usually a 12 mm bar bent 90° and extending into the landing beam. This region experiences the highest negative moment because the slab switches from tension (on the slope) to compression (on the landing). Skipping the crank bar leads to a hairline crack at the joint within 12-18 months, and then the crack widens as the stair is used.
For a landing that is 300 mm deep, the crank bar should extend at least 150 mm into the landing and be anchored with a 90-degree hook of 150 mm radius. Tie the crank bar to the main bar with a 6 mm hook at the exact point where the slope meets the landing.
Landing Beam and Mid-Landing Beam
A landing beam is a reinforced concrete beam that sits under the landing slab and carries the reaction from the stair flights on either side. The typical size for a residential landing is 230 mm x 300 mm (depth x width). Within this beam we place four 12 mm Fe-500 main bars longitudinally and 8 mm stirrups at 150 mm c/c transverse to resist shear.
Mid-landing beams become necessary when the stair has a land between two flights (common in 2-storey houses). If the land is wider than 600 mm, a beam of 200 mm depth and 300 mm width is recommended, with the same reinforcement pattern. For lands narrower than 600 mm you can get away with a plain slab of 150 mm thickness, but only if the slab is well-compacted and the cover is 25 mm.
When the stair is a straight run without any land, the landing beam can be omitted, but the crank bar must be robust. In an open-well stair where the landing is supported by a column, the column footings must be checked for adequate bearing - see our Footing in House Construction 2026 article for details.
Remember to provide a clear cover of 20 mm for the beam steel as well. In coastal homes increase it to 30 mm. The beam must be topped with a 20 mm cement-sand mortar layer before the concrete pour, otherwise the bond between the landing slab and the beam will be compromised.
Common Mistakes Homeowners Should Watch For
- Using 10 mm bars for a 1.2 m wide stair - the bar is too thin and will snap under normal foot traffic.
- Providing only 100 mm waist slab thickness - this cracks within weeks because the concrete cannot resist the bending moment.
- Skipping the 20 mm clear cover in interior stairs - leads to early rusting, especially with low-grade cement.
- Leaving lap length at 300 mm instead of the required 600 mm - the reinforcement fails at the splice, causing sudden collapse.
- Omitting the crank bar at the landing-flight junction - results in a hairline crack that widens fast.
- Using 8 mm distribution bars at 200 mm c/c for a 1.5 m wide stair - the transverse reinforcement is insufficient to spread the load.
- Not providing stirrups in the landing beam - shear cracks appear at the beam ends under live load.
- Reusing old formwork that is warped - leads to uneven slab thickness and weak spots.
- Ignoring seismic zone requirements - thin waist slabs in Zone IV/V will fail during an earthquake.
- Accepting a contractor's claim that "the slab is self-compacting" without a slump test - low workability means the steel may be exposed.
Each of these errors has a cost impact far greater than the extra steel or extra concrete you would have to spend to do it right. A cracked stair can bring down a whole flight, forcing you to rebuild and delay occupancy.
How to Verify Your Staircase Reinforcement on Site
- Check the bar size: ask to see the TMT tags. 12 mm Fe-500 should be marked "12 mm-Fe-500".
- Measure the waist slab thickness with a steel ruler - it must be at least 125 mm, preferably 150 mm.
- Confirm clear cover: place a steel ruler from the outer concrete surface to the bar centre; it should read 20 mm (or 25-30 mm for coastal).
- Count the distribution bars across the width - there should be a bar every 150 mm for a 1.0-1.2 m stair.
- Inspect lap overlaps: each 12 mm bar must overlap the next for 600 mm, and the overlaps must be staggered.
- Look for the crank bar at every landing. It should be a 12 mm bar bent 90° into the landing, with a 150 mm hook.
- Verify the landing beam dimensions on site - 230 mm depth and 300 mm width for a standard landing.
- Check stirrup spacing in the landing beam - 8 mm bars at 150 mm c/c, tied around the four longitudinal bars.
- Ask for a concrete slump test report. A slump of 75-100 mm is ideal for stairs.
- Take photos of each reinforcement stage: before concrete pour, after concrete, and after curing.
- Confirm the curing method - water curing for at least 7 days or a curing compound as per Concrete Curing Methods, Duration and Mistakes Indian Homeowners Make 2026.
- Cross-check the reinforcement schedule with the contractor's shop drawing; any deviation should be signed off by you.
Doing this checklist yourself, or having a trusted site engineer A well-reinforced stair lasts decades; a poorly detailed one gives you a crack in a month and a lawsuit in a year.