
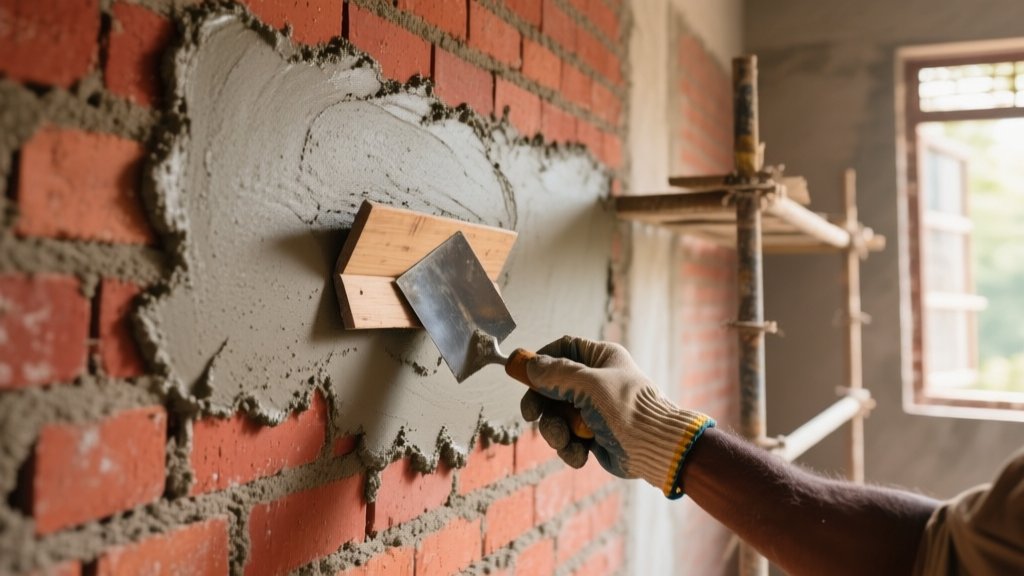
Internal vs External Plaster - what's the real difference?
Internal plaster lives in a dry, temperature-stable environment. You can get away with a 12-15 mm cement-sand coat and a thin skim of POP or gypsum for a smooth finish. External plaster fights rain, sun and temperature swings, so we usually go for a 15-20 mm cement-sand coat, a waterproofing primer and then a POP or gypsum skim if the budget allows.
Key points - internal walls need only moisture resistance, external walls need water-proofing and higher thickness. Skipping the primer on the outside is the most common fraud in the trade - you'll see cracking and spalling within weeks.
| Aspect | Internal Plaster | External Plaster |
|---|---|---|
| Typical Thickness | 12-15 mm cement-sand + 3-5 mm POP/gypsum | 15-20 mm cement-sand + 5-8 mm POP/gypsum |
| Waterproofing Needed | Usually not | Yes - primer + bitumen or polymer coating |
| Finish Options | Paint, wall-paper, tiles | Paint, textured finish, cladding |
| Cost (per sq ft) | Rs. 45-70 | Rs. 70-110 |
Cement Plaster vs POP vs Gypsum - which one to pick?
Cement plaster is cheap, strong and tolerates humidity. It's the go-to for exteriors and for walls that will bear heavy loads (like kitchen backs). POP (Plaster of Paris) gives a very smooth surface, but it's brittle under impact - good for interiors where you want a flawless finish. Gypsum plaster is lighter, dries faster and is ideal for false ceilings; however it must be protected from moisture.
Brands you'll see on site: JK Cement (Rs.6-8 per kg), Ultratech M-sand (Rs.2-3 per kg), Saint-Gobain Gyproc (Rs.120-150 per sq ft board). For POP, Fascient POP bags run about Rs.250-300 each (25 kg).
Related: POP vs Gypsum Plaster - Complete Comparison Guide for Indian Homes 2026
Mix Ratios - the numbers that matter
Most Indian contractors stick to 1:4, 1:6 or 1:8 cement-to-sand ratios. The rule of thumb: the higher the sand proportion, the smoother the finish, but you lose strength. For internal walls a 1:6 mix (cement:sand) gives a good balance. For external walls, especially where you'll apply a POP skim, a 1:4 mix is safer.
| Ratio | Cement (kg) | Sand (kg) | Typical Use |
|---|---|---|---|
| 1:4 | 50 | 200 | External walls, high-load areas |
| 1:6 | 50 | 300 | Internal walls, standard finish |
| 1:8 | 50 | 400 | Ceilings, light partitions |
Always add 5-7 % extra cement to compensate for water loss during curing. Water-cement ratio should stay around 0.45 for cement plaster; gypsum needs a much lower ratio, about 0.30.
Sand Selection - M-sand or River Sand?
River sand has a rounded grain shape, which makes it easier to work with but it contains more silt and can cause shrinkage cracks if not washed properly. M-sand (manufactured sand) is angular, gives better bonding, and is cheaper in most metros (Rs.2-3 per kg vs Rs.3-4 for river sand). For external plaster, I always recommend M-sand - the angularity improves adhesion to the brick or concrete surface.
If you're on a tight budget and have good quality river sand, wash it at least three times and pass it through a 2 mm sieve. Anything coarser than 4 mm will leave a rough texture you'll regret later.
Curing - don't skip it, it's not optional
After plastering, keep the surface moist for at least 7 days for cement plaster and 3 days for gypsum. Spray water lightly every 12 hours, then cover with a damp burlap or plastic sheet. For external walls, a waterproofing primer must be applied after the first 24 hours, then a second curing cycle before the primer sets.
Skipping curing is the most common idiot mistake - you'll see powdery surface, early cracks and reduced bond strength. A simple bucket of water and a piece of cloth does the job; no need for fancy curing compounds.
Thickness Guidelines - walls vs ceilings
Internal walls: 12-15 mm cement-sand, topped with 3-5 mm POP or gypsum. External walls: 15-20 mm cement-sand, topped with 5-8 mm POP. Ceilings: 9-12 mm cement-sand (1:8 mix) or 10-15 mm gypsum board, depending on load.
Too thin a coat on external walls invites water ingress; too thick a coat on ceilings adds unnecessary weight and may sag. Aim for the sweet spot and stick to it.
Common Plastering Mistakes Indian Homeowners Make
- Using the wrong sand - river sand without proper washing leads to cracks.
- Wrong mix ratio - 1:8 for external walls makes plaster crumbly.
- Skipping primer on external walls - cheap water-proofing paint won't stick to fresh cement.
- Not curing properly - plaster dries too fast, shrinks and cracks.
- Applying POP over damp cement plaster - POP won't bond, you'll see delamination.
- Over-trowelling - trying to level with a trowel instead of using a straightedge leads to uneven thickness.
- Using cheap, ungraded cement - OPC 33 grade is the minimum; anything lower gives a weak finish.
Cost per Sq Ft in 2026 - realistic numbers
These rates assume standard labour costs in tier-2 and tier-3 cities. Prices in metro areas can be 20-30 % higher.
| Plaster Type | Material Cost (Rs. Per sq ft) | Labour Cost (Rs. Per sq ft) | Total (Rs. Per sq ft) |
|---|---|---|---|
| Cement Plaster (1:6) | 20-30 | 25-35 | 45-70 |
| POP (2-bag skim) | 30-45 | 30-45 | 60-90 |
| Gypsum Plaster | 35-50 | 30-40 | 65-90 |
| External Cement Plaster + Primer | 40-55 | 35-50 | 75-110 |
Related: Plastering Cost Per Sq Ft India 2026: Complete Rate Guide
Bottom line - pick wisely, cure properly
If you're finishing an interior bedroom, go with a 1:6 cement-sand mix, 12 mm thickness, topped with a 4 mm POP skim and cure for 5 days. For a front façade, use a 1:4 mix, 18 mm thickness, M-sand, apply a waterproof primer, then a 6 mm POP skim and give it a 7-day cure. Stick to the ratios, use clean sand, and never skip curing - you'll save money on rework and get a finish that lasts.
Related: Plastering Techniques for Indian Homes 2026 - Types, Mix Ratio and Common Mistakes
Wall preparation before plastering - what masons skip
First thing is to hack the RCC or brick face until you see a ragged, dust-free surface. A 2-mm wire brush does the job, then blow off the dust with a dry hose.
Water the wall 6-8 hours before you start plastering; the surface should be damp but not puddled. This prevents laitance and helps the bond coat stick.
Apply a cement-slurry bond coat (1 part cement : 4 parts sand, water-to-slurry ratio 0.35) on any RCC-concrete interface. Use a 15-20 mm gap filler (usually 20 mm thick chicken mesh) where masonry meets RCC to absorb differential movement.
Repair all visible cracks with a quick-setting cement (e.g., "Ultratec" 25 kg bag at Rs. 140) before the main plaster. Skip this and you'll see delamination in a week.
Plastering tools and equipment used on Indian sites
Wooden float (2 ft, Rs. 120) for the first pass, then steel trowels - 200 mm for corners, 250 mm for large areas (Rs. 250 each). Aluminium screed 2 m long, 1 kg, Rs. 180 for straightness checks.
Plumb bob (steel, Rs. 150) and 4-ft spirit level (Rs. 200) keep verticals true. Corner trowel (120 mm, Rs. 300) gives crisp edges.
Mortar board (20 kg, Rs. 350) and mixing trough (50 L, Rs. 500) are must-haves. Measuring box of 1 cft capacity costs Rs. 250 and saves mix errors.
Water hose with mist spray nozzle (Rs. 80) keeps the plaster from drying too fast. Scaffold height of 3.5 m is standard; a mason can reach 2.5 m comfortably with a 2-ft trowel.
For big jobs we rent a Putzmeister plaster sprayer (model 5-A) at Rs. 1.20 lakh per month; it cuts labour by half.
How to check plaster quality - the 4 tests that matter
Adhesion test: tap the surface with a wooden mallet. A clear, hollow sound means the plaster is not bonded - scrap and re-apply.
Straightness test: lay a 2-m aluminium screed across the wall. Gap should not exceed 3 mm. Anything more indicates uneven plaster or sagging.
Surface plane test: use a 1.5 m straight edge. No visible gap means the plane is within tolerance; if you see a dip, sand it down before painting.
Pull-off test: with a portable adhesion tester, pull a 20 mm steel disc. Minimum acceptable value is 0.3-0.5 N/mm². Below that, the mix was too lean.
Water absorption test: drop 5 ml water on the cured surface. If it disappears in 5 minutes, the plaster is porous - add a waterproofing admixture next time.
Cracks in plaster - causes and how to fix them
Hairline shrinkage cracks appear when curing is too fast; keep the wall damp for 24 hours and you'll avoid them.
Structural cracks come from foundation or beam settlement. They need a structural solution first, then a polymer-modified mortar patch - "Cementit PM 3" at Rs. 140 per 20 kg bag.
Expansion cracks show up at joints between dissimilar materials (brick-RCC). Use 2 mm chicken mesh and a flexible joint filler (Sika Flexi-Joint, Rs. 120 per tube).
Efflorescence - white salt deposits - means moisture is migrating. Clean with a 1 % muriatic acid solution, then apply a breathable lime-sand plaster.
Crazing pattern is surface stress; sand the area, then skim with a thin polymer-modified coat.
Plaster thickness for different wall types - IS code guidance
| Wall type | Coats | Thickness (mm) |
|---|---|---|
| Internal brick (single coat) | 1 | 12 |
| Internal brick (double coat) | 2 | 15 |
| External masonry | 1-2 | 18-20 |
| Ceiling plaster | 1 | 6-8 |
| Bathroom waterproof plaster | 2 | 15-20 |
IS 1661 says the minimum for a smooth finish is 12 mm, but for tile backing you need at least 18 mm to avoid later cracks.
Sponge finish can be done with 10-12 mm; smooth trowel finish needs the full 15 mm to hold paint without peeling.
Waterproof plaster vs normal plaster for bathrooms and terraces
We add SBR latex (e.g., Sika SBR-30, Rs. 600 per 25 kg bag) at 5 % of cement weight for flexibility. Powder waterproofing agents like Dr. Fixit LW+ (Rs. 180 per 20 kg) or Fosroc "WPM" (Rs. 210 per 20 kg) are mixed into the mortar.
Acrylic-based membranes cure faster but are more expensive; crystalline systems (Fosroc "Crys-Seal") develop waterproof crystals inside the plaster.
Apply in two coats, each 8-10 mm, to achieve a total thickness of 15-20 mm. The extra cost is Rs. 8-12 per sq ft over normal plaster.
After curing, do a ponding test: fill the area with water 10 mm deep for 48 hours. No seepage means the job is done.
Lime plaster revival - traditional chuna plaster for heritage homes
Mix hydrated lime with surkhi (brick dust) in a 1 : 1 ratio, then add sand 2-3 times the lime volume (1 : 2 or 1 : 3 lime-sand mix). Use a wooden float to apply.
Lime plaster breathes; it lets walls "exhale" moisture, which is why old houses in Rajasthan and Gujarat stay cool. Curing takes 21 + days, keep it damp for the first week.
Crack incidence is almost nil because lime sets slowly and flexes with the wall. For modern retrofits, buy ready-made lime putty - Birla Lime Putty Rs. 250 per 20 kg, J.K. White Rs. 280 per 20 kg.
Use this for heritage façades, temple walls, and coastal Kerala homes where salt-air corrosion is a concern. The finish is naturally matte and ages beautifully.