
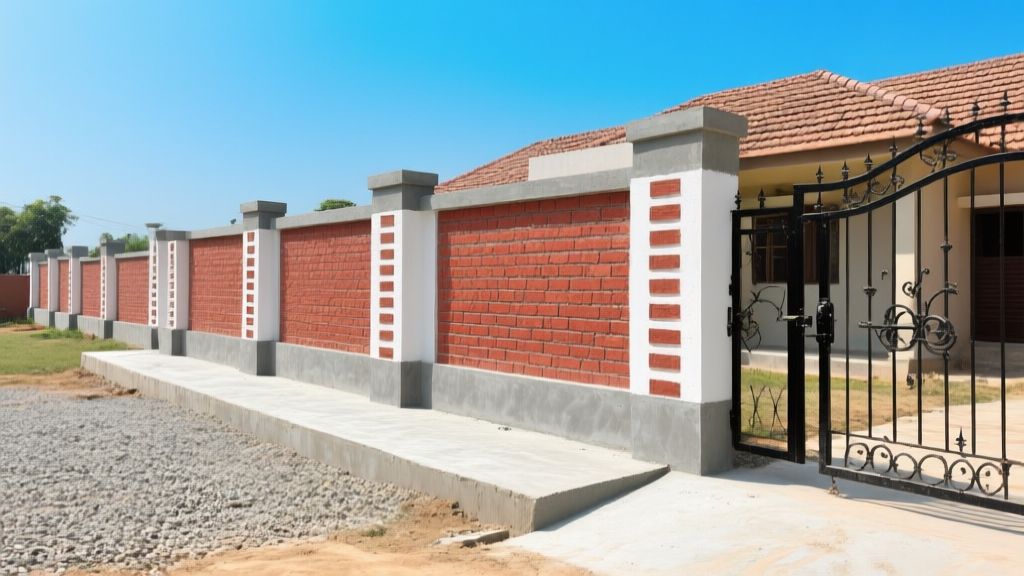
Building a compound wall is often the first major step after acquiring a plot, yet many homeowners treat it as a simple boundary marker rather than a long-lasting architectural element. This guide walks you through everything you need to know - from legal height limits to material choices, design ideas and the construction workflow - so that your wall not only secures the property but also adds value and visual appeal.
Understanding Compound Walls - Purpose and Benefits
A compound wall (also called a boundary or perimeter wall) is the physical and visual demarcation that encloses a residential plot. While its primary role is security, a well-designed wall serves several additional functions:
- Privacy: Keeps prying eyes away from your garden, parking area and interiors.
- Boundary definition: Eliminates disputes with neighbours by clearly marking property limits.
- Aesthetic appeal: Acts as the first impression of your home, setting the tone for the façade.
- Property value: A sturdy, attractive wall can enhance resale value and attract better offers.
- Noise reduction: Thick masonry or stone walls can dampen street noise, especially in busy urban locations.
Because the wall is exposed to weather, soil pressure and occasional impacts, its design must be approached with the same rigor as the main house.
Height Rules and Municipal Regulations Across India
Before you draw the first line on the ground, check the local building bylaws. While each state and municipal corporation may have slight variations, the following ranges are common across most Indian cities:
- Residential plots (single-family): 1.5 m to 2.1 m measured from the ground level to the top of the wall.
- Gated societies or high-density colonies: Up to 2.4 m, often accompanied by a decorative parapet.
- Commercial or mixed-use plots: May allow heights up to 3 m, but usually require a separate permission.
- Gate pillars: Typically 2.5 m to 3 m tall, with a clearance of at least 3.5 m for vehicle passage.
Key points to verify with the local authority:
- Maximum permissible height from the ground or from the finished floor level (FFL).
- Setback requirements - how far the wall must be from the road or footpath.
- Fire-safety and ventilation provisions (especially for solid masonry walls).
- Any heritage or environmental restrictions that may limit material usage.
Non-compliance can result in demolition notices or hefty penalties, so a quick visit to the municipal office or consulting a local architect can save you a lot of trouble later.
Choosing the Right Material - Comparison of Popular Options
The material you select determines the wall's durability, maintenance effort, and visual character. Below is a quick snapshot of the most common choices for Indian homes in 2026.
| Material | Durability & Strength | Maintenance Needs | Typical Use Cases |
|---|---|---|---|
| Brick Masonry (clay brick) | Excellent compressive strength; good thermal mass. | Periodic pointing and plastering; resistant to termites. | Traditional homes, budget-friendly projects. |
| RCC Columns + Brick Panels | High load-bearing capacity; column-based frame adds rigidity. | Minimal upkeep; columns protect bricks from impact. | Modern villas, high-rise gated communities. |
| Stone Masonry (granite, laterite) | Very high durability; natural weather resistance. | Rarely requires repair; occasional cleaning. | Luxury residences, heritage-style designs. |
| Precast Concrete Panels | Consistent quality; fast installation. | Low - only occasional sealing of joints. | Urban plots with tight construction schedules. |
| MS (Mild Steel) Grill + Brick Infill | Good structural support; grill offers ventilation. | Paint to prevent rust; check for corrosion. | Contemporary designs, security-focused walls. |
| Chain Link with Wire Mesh Finish | Lightweight; not load-bearing. | Re-coating every 3-5 years to avoid rust. | Security perimeters where visibility is essential. |
| AAC (Autoclaved Aerated Concrete) Blocks | Light yet strong; excellent fire resistance. | Requires protective plaster; low water absorption. | Eco-friendly projects, high-rise walls. |
| Fly Ash Blocks | Good compressive strength; utilizes industrial waste. | Similar to AAC - needs plaster or render. | Cost-effective and sustainable options. |
When choosing, weigh the local climate (humid coastal areas favour stone or RCC, while dry interiors can comfortably use brick or AAC) and the aesthetic language of your home. For a deeper dive into brick selection, see our Brick Size and Quantity Guide, and to understand the right material thickness for the wall panels, our Plastering Guide for Indian Homes covers cement-sand ratios and finish types.
Foundations, Footings, and Structural Stability
Even the strongest wall will fail if it rests on a weak foundation. The foundation design must consider soil bearing capacity, groundwater level and the anticipated load from the wall and any attached fixtures (such as gates or lighting).
Typical Footing Layout
- Depth: Minimum 900 mm below the ground for residential plots; increase to 1.2 m if the soil is loose or the water table is high.
- Width: At least 600 mm for brick walls; 800 mm for RCC column-based walls.
- PCC (Plain Cement Concrete) Base: 100 mm thick concrete layer poured over a compacted sand-cobble bed, providing a clean, level surface.
- Reinforcement: 10 mm TMT bars at 200 mm centers for brick walls; 12 mm bars for RCC columns.
- Anti-Termite Treatment: Apply a termite-proof chemical barrier (soil treatment or physical membrane) before back-filling the footings. This is crucial for any masonry wall that uses soil as backfill.
Integrating Columns and Beams
For RCC column + brick panel systems, columns are usually spaced 2.4 m to 3 m apart. A reinforced concrete beam (often 150 mm thick) ties the columns together at the top, providing a continuous load path and reducing the risk of wall cracking due to differential settlement.
Drainage Considerations
Water accumulation behind the wall can cause hydrostatic pressure, leading to bulging or cracking. Incorporate a weep hole or a 50 mm drainage pipe at the base, and ensure the backfill is compacted in 150 mm layers with a lean concrete layer (100 mm) near the footing.
Design Patterns, Aesthetic Finishes and Vastu Guidelines
A compound wall can be a plain security barrier or a statement piece that mirrors the architectural language of your house. Below are popular design patterns and how they align with traditional Vastu principles.
| Pattern | Visual Impact | Structural Implications | Vastu Suitability |
|---|---|---|---|
| Solid Masonry | Strong, monolithic look. | Highest load-bearing; simple construction. | Ideal for the north and east sides - creates a protective barrier. |
| Jali (Perforated Stone/Brick) | Elegant lattice work, allows airflow. | Requires additional lintels or steel frames. | Best on the west and south sides - promotes ventilation while keeping harsh sunlight at bay. |
| Parapet Coping | Finishing cap that adds height without bulk. | Needs a reinforced concrete slab or steel coping. | Neutral - can be placed on any side; helps in rainwater runoff. |
| Vertical Strips (MS Grills) | Modern, semi-transparent look. | Lightweight; requires sturdy anchorage to columns. | Suitable for the front (south) façade - reflects positivity. |
| Stone Cladding | Luxurious, natural texture. | Additional anchorage and waterproofing layer. | Preferred on the north-west corner - considered auspicious for wealth. |
Finishing Options
- Plaster & Paint: Cement-sand plaster followed by breathable, waterproof paint works well for brick walls.
- Tile or Stone Facing: Adds a premium look; ensure proper waterproofing behind the tiles.
- Stucco or Lime Plaster: Traditional finish that breathes, ideal for heritage homes.
- Eco-Coats: Silicate or polymer-based coatings that resist mould and UV degradation.
Vastu Tips for Placement
- Place the main gate in the north-east or east direction to invite positive energy.
- The wall height opposite the main house should not exceed the house's roof height by more than 30 cm, to avoid "over-shadowing".
- Corner pillars should be square or slightly rounded; sharp angles (30 deg) are discouraged as they are believed to create "Brahmastra" points.
- If the plot is on a slope, maintain a uniform top level; uneven heights are said to cause imbalance in family dynamics.
Construction Process - From Marking to Finishing
Following a systematic workflow reduces rework and ensures the wall meets design and regulatory expectations.
1. Site Survey and Marking
- Obtain the exact plot dimensions from the land record and verify with a total station or theodolite.
- Mark the wall line using lime powder or wooden stakes. Ensure the line follows the legal boundary, not just the visual edge.
2. Excavation and Footing Preparation
- Excavate to the required depth (see foundation section). Remove loose soil and compact the base with a mechanical plate compactor.
- Lay a 100 mm sand-cobble bed, then pour the PCC base. Use a vibrator to eliminate air pockets.
3. Setting Columns and Beams (if applicable)
- Place reinforcement cages as per structural drawings.
- Cast columns in situ or use pre-cast concrete columns. Allow proper curing (minimum 7 days).
- Install the tying beam at the column heads before the wall panels are built.
4. Raising the Wall Panels
- For brick masonry, lay bricks with a 10 mm mortar joint, ensuring each course is level with a spirit level.
- For AAC/fly ash blocks, use a thin-set mortar (1:3 cement:sand) and apply a plaster coat after the blockwork is complete.
- For precast panels, lift them with a crane and fix them with steel plates and epoxy grout.
5. Incorporating Openings and Jali Work
- Install lintels (reinforced concrete or steel) above gates and windows before the brickwork reaches that height.
- For jali patterns, pre-fabricated metal or stone screens are fixed on temporary supports and later tied to the main wall.
6. Plastering, Curing and Finishing
- Apply a 12 mm cement-sand plaster on both sides for solid walls; a 9 mm skim coat for smoother finishes.
- Allow proper curing - keep the surface damp for at least 48 hours to prevent shrinkage cracks.
- Paint or apply the chosen finishing coat. Install coping or parapet caps to protect the topmost course from rain ingress.
7. Drainage and Backfill
- Lay a 50 mm perforated pipe at the base, covered with a geotextile sheet.
- Backfill with well-graded crushed stone up to the footing level, then compact in layers.
- Finish with topsoil and landscaping as per the overall site plan.
Common Pitfalls, Maintenance Practices and Future-Proofing
Even experienced builders can overlook details that later become costly headaches. Below are the most frequent errors and how to avoid them.
Typical Mistakes
- Inadequate foundation depth: Leads to settlement cracks, especially in laterite or black cotton soil.
- Missing expansion joints: Concrete panels expand with temperature; joints prevent random cracking.
- Poor drainage: Water pooling behind the wall creates hydrostatic pressure and mould growth.
- No coping or parapet: Direct rain impact erodes mortar joints and accelerates spalling.
- Weak column-beam connection: Results in a "soft" wall that sways under wind load.
Maintenance Tips for Longevity
Long-term durability also depends on the concrete mix used in the foundation and columns. Our Concrete Mix Ratio Guide explains the correct M-grade selection for boundary walls.
- Inspect the wall annually for mortar cracks; re-point using a cement-lime mix to maintain breathability.
- Clean the surface of salt deposits (especially in coastal areas) with a mild acid wash and re-apply a protective coating.
- Check the integrity of drainage pipes before the monsoon; clear any blockages.
- Re-paint or re-coat the wall every 5-7 years to protect against UV fading and rain-induced chalking.
- For steel grills or MS coping, apply a rust-preventive primer and touch-up paint every 3 years.
Future-Proofing Your Compound Wall
- Leave provisions for a future gate automation system - embed conduit boxes at the column bases.
- Design the wall with a slight setback (10-15 cm) from the property line to allow for possible boundary adjustments.
- Use modular panels where possible; they can be replaced or upgraded without demolishing the entire wall.
- Consider integrating a low-level lighting system within the coping to improve night-time visibility and security.
FAQ - Quick Answers to Common Queries
What is the minimum legal height for a residential compound wall in most Indian cities?
Generally, the minimum permissible height is 1.5 m, while the maximum is usually capped at 2.4 m. Always verify with your local municipal office as exceptions exist for gated colonies.
Can I mix different materials (e.g., stone at the front and brick at the back) in the same wall?
Yes, mixed-material walls are common. Ensure that the structural core (columns or footings) is designed for the heaviest material, and use compatible mortar or anchorage systems at the junctions.
Is a solid brick wall better than a precast concrete wall for security?
Both provide strong security when constructed correctly. Brick walls have the advantage of higher mass, which resists impact, while precast walls offer faster construction and uniform quality. Choose based on timeline, aesthetic preference and local contractor expertise.
Do I need a separate drainage system behind the wall?
Yes. A weep hole or a perforated drainage pipe behind the wall prevents water buildup, which can cause hydrostatic pressure and eventually lead to bulging or cracking.
How often should I repaint my compound wall?
For most cement-based finishes, a fresh coat every 5-7 years maintains protection against rain, UV and salt (in coastal zones). Steel elements need more frequent rust-preventive painting.
Can compound walls affect the Vastu of my home?
According to Vastu Shastra, the wall height and placement relative to the main house influence energy flow. Keeping the wall slightly lower than the house roof, positioning the main gate in the north-east, and avoiding sharp protruding corners are considered favourable.