
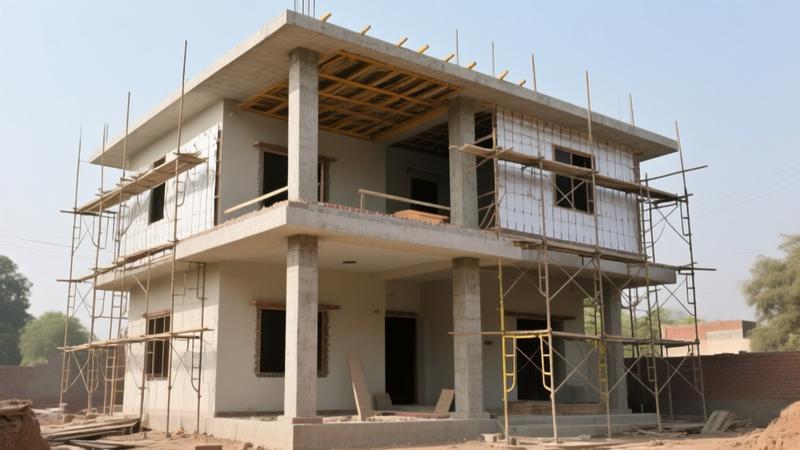
1. Structural Assessment - Know What You're Standing On
Before you even think of lifting a brick, get a qualified structural engineer to check the existing frame. The engineer will look at column dimensions, slab thickness, and the condition of the concrete. In most 10-year-old houses the columns are 230 mm x 230 mm with 12 mm dia #5 bars at 150 mm c/c - good enough for a single extra floor but not for two.
Key checks:
- Column load bearing capacity (use IS 456 tables or a simple beam-column analysis).
- Existing slab depth - 125 mm for a normal roof, 150 mm for a floor that will hold furniture.
- Signs of cracking, corrosion of rebars, or water ingress.
- Soil bearing capacity - do a bore-hole test if the house is on loose alluvium.
If any of these fail, you're looking at a major strengthening job. Skipping the foundation check is one of the most expensive mistakes you can make.
2. Foundation Check and Strengthening Options
Most Indian homes sit on strip footings 300 mm wide and 150 mm deep with 8 mm TMT bars. For a G+1 you may get away with adding a plinth beam under the new columns, but a G+2 usually forces you to deepen the footings or add pile caps.
| Scenario | Typical Existing Footing | Required Modification |
|---|---|---|
| G+1 on good soil | 300 mm x 150 mm strip | Add 150 mm thick plinth beam, increase bar size to 12 mm @ 200 mm c/c |
| G+2 on moderate soil | 300 mm x 150 mm strip | Enlarge to 450 mm x 250 mm or install bored piles 600 mm dia x 10 m deep |
| Weak soil (bearing < 100 kN/m2) | Any | Full pile foundation - 12-16 m piles, 300 mm dia, reinforced with 12 mm TMT |
Foundation strengthening can add Rs. 150-250 per sq ft to the overall cost. Tata Tiscon steel is a safe bet; it costs about Rs. 6-8 per kg more than Kamdhenu, but the extra strength is worth it for footings.
3. Extending Columns, Beams and Slabs
Columns are usually extended by welding plates or by casting new concrete on top of the existing stub. The joint must be keyed - a 150 mm lap with 8 mm dia rebar tied into the old column is the minimum. For a G+1 you can keep the same column size, but for G+2 bump it up to 250 mm x 250 mm with 16 mm bars at 150 mm c/c.
Beams that support the new floor need to be redesignated. A typical 200 mm wide, 250 mm deep RCC beam with 12 mm bars at 150 mm c/c will carry a 1.5 ton load per meter. For two extra floors, move to 250 mm x 300 mm and use 16 mm bars at 120 mm c/c.
Slab thickness for the added floor should be at least 150 mm if you plan a tiled floor, 180 mm if you want a concrete finish. Use a 1:2:4 mix for the slab and provide a 12 mm minimum cover.
4. Staircase Extension and Layout
Staircases are the Achilles heel of vertical extensions. A 300 mm wide stair tread with a 150 mm rise is comfortable for Indian families. For a G+2 you may need to split the stair into two flights with a landing, otherwise the headroom will be cramped.
Don't just bolt a new stair to the old landing. Cut a concrete pad of at least 150 mm thick and embed 12 mm rebars tied into the existing slab. This prevents the dreaded "settlement crack" that shows up after the first monsoon.
5. Permits, Approvals and Legal Checklist
Every municipality in India demands a building plan, structural calculations, and a soil report. The Building Permits and Approvals Required for House Construction in India 2026 - Complete Guide lists the exact forms. Expect to pay a development charge of 1-2% of the built-up area value and a fire-NOC if the total built-up exceeds 250 sq m.
Skipping the paperwork will get you a stop-work notice and a fine of Rs. 10,000-50,000 per day. It also makes it impossible to get a home loan for the added floor.
6. Cost Per Square Foot - Rough Ranges
All numbers are approximate and vary by city.
- G+1: Rs. 1,800-2,400 per sq ft (includes foundation check, extra steel, plaster, paint).
- G+2: Rs. 2,300-3,200 per sq ft (adds foundation deepening, larger columns, extra labor).
These figures exclude land cost, interior finishes, and utility upgrades.
7. Common Mistakes to Avoid
Most owners repeat the same blunders:
- Assuming the old roof can bear the new load without reinforcement.
- Using undersized rebars to save a few bucks - it leads to cracking within a year.
- Skipping the soil bearing test and later discovering the ground cannot support the extra weight.
- Building the stair without proper landing - you'll get a steep climb that's a safety hazard.
- Hiring a contractor who promises "no permits needed". That's a fraud.
Read Common Construction Mistakes to Avoid During House Building in India 2026 for a deeper dive.
8. Selecting a Contractor and Engineer
Never go with the lowest bid. A good contractor will have a portfolio of at least three vertical extensions and will be willing to share structural drawings. Ask for a copy of their last BSR (Bar Bending Schedule); the Bar Bending Schedule (BBS) for House Construction - Complete Guide explains what to look for.
The structural engineer should be a licensed professional (PE) with experience in residential vertical extensions. Their fee is usually 0.5-1% of the construction cost, but it saves you from costly rework.
9. When Not to Add a Floor
Say no if any of these apply:
- Foundation depth less than 150 mm and soil bearing capacity below 100 kN/m2.
- Columns are smaller than 230 mm x 230 mm with only 8 mm rebars.
- Visible corrosion on the reinforcement or severe settlement cracks.
- Neighbourhood zoning limits - many municipal plans cap height at 12 m for residential plots.
Trying to force a floor on a weak structure is a recipe for collapse, especially during the monsoon.
10. Step-by-Step Process from Assessment to Handover
- Site Survey: Engineer records existing dimensions, takes soil samples.
- Design Phase: Structural calculations, column/beam sizing, stair layout.
- Permit Submission: Submit drawings, pay fees, obtain NOC.
- Foundation Work: Strengthen footings or install piles.
- Column Extension: Cast new column heads with keyed joints.
- Beam & Slab Casting: Place formwork, fix reinforcement, pour concrete.
- Staircase Construction: Build landing, install handrails.
- Finishing: Plaster, waterproof, install electrical and plumbing.
- Inspection: Municipal engineer checks compliance.
- Handover: Owner receives as-built drawings and BBS.
Stick to this sequence and you'll avoid the usual delays and extra costs.
Bottom line: Adding a floor is doable, but only if the existing structure is sound, the foundation is upgraded, and you follow the legal process. Cut corners and you'll pay later - sometimes with structural damage or worse.
10. Engineer vs Contractor - Who Decides What
The structural engineer is the brain behind the project. He/she prepares the load-bearing calculations, decides column sizes, slab thickness and any reinforcement required. The contractor's job is to turn those drawings into reality, following the exact mix designs, placement tolerances and curing schedules prescribed by the engineer.
Never let a contractor dictate the design. A common trap is the "cheaper design" pitch - they may suggest smaller columns or thinner slabs to save material, but that compromises safety and can trigger legal trouble later. Insist on getting the complete structural set drawn and signed off before you even approach a contractor.
Once the design is in hand, invite at least three reputable contractors to submit quotations. Their bids should be based strictly on the engineer's drawings, not on any ad-hoc changes they propose. This creates a level playing field and prevents hidden cost escalations.
An experienced site engineer will visit the site at critical stages: before the foundation is excavated, during column casting, at the start of slab pouring, and again before the final finishing works. These spot-checks verify that the contractor is using the right concrete grade, steel diameter and spacing, and that curing is being done as specified.
By keeping the design authority firmly with the engineer and treating the contractor as a skilled executor, you protect the structural integrity of the added floor and avoid costly rework.
11. Frequently Asked Questions
How much does it cost to add a floor to an existing house in India?
Cost varies with location, material choice and structural complexity, but a typical G+1 addition runs between Rs. 1,200 to Rs. 2,000 per square foot, inclusive of design, approvals and basic finishes.
Can I add two floors at once on a single-storey house?
Only if the existing foundation and soil bearing capacity can support the extra load. This requires a full foundation assessment and often deep piling or raft foundation, which adds significant cost and time.
Do I need building permission to add a floor in India?
Yes. Every state mandates a building plan approval from the local municipal corporation or development authority. The plan must be stamped by a licensed structural engineer and include structural calculations.
How long does it take to add a G+1 floor on an existing house?
From design finalisation to handover, a well-coordinated project usually takes 4 to 6 months, assuming no major delays in material supply or municipal clearances.
What is the biggest risk when adding a floor to an old house?
The biggest risk is an inadequate foundation. If the original footings were designed for a single storey, adding load without reinforcement can lead to settlement cracks, column buckling or even collapse.