
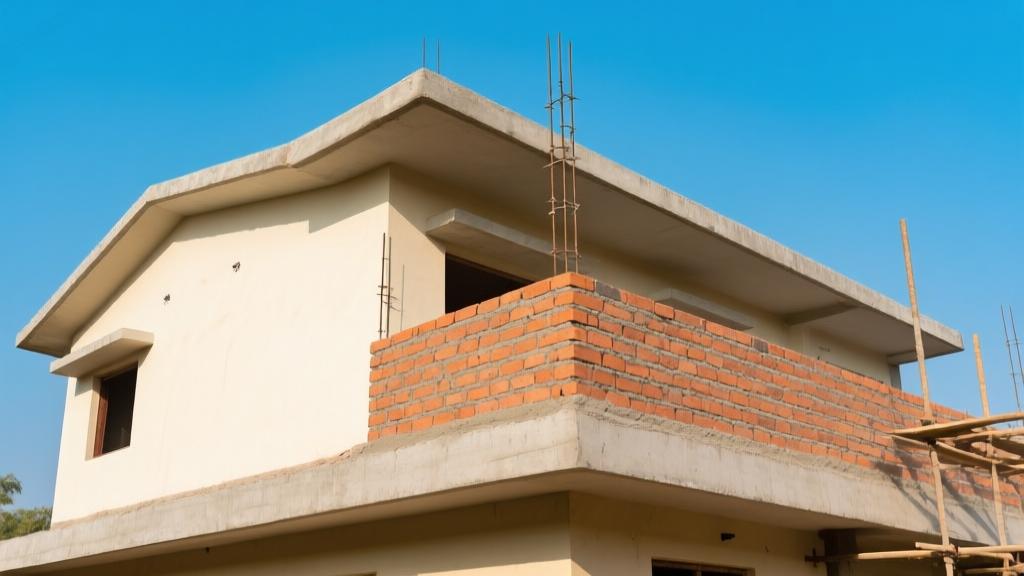
What is a parapet wall and why you need it
A parapet wall is the low rise barrier that runs along the edge of a roof, balcony or terrace. It is not a decorative flourish; it does real work. First, it acts as a safety guard preventing people and objects from falling off. Second, it hides the roof-drainage fittings and gives a neat finish to the building silhouette. Third, it provides a convenient seating ledge for rooftop gatherings. Fourth, it serves as a wind-break, especially useful in coastal towns where gusts can lift loose tiles. Fifth, it offers a structural tie-in for roof waterproofing layers and coping stones.
In our experience, owners who skip the parapet to save a few thousand rupees end up paying three to four times that amount when water seeps into the roof slab or when a neighbour files a negligence complaint. A well-designed parapet is a cheap insurance policy.
Code-mandated heights - IS 456 and IS 875
Both IS 456:2000 and IS 875:2000 prescribe a minimum parapet height of 900 mm (about 3 ft). For a single-storey house the accepted practice is 2.5-3 ft; for two to three storeys the height jumps to 3.5-4 ft. The reason is simple: the higher the slab, the larger the potential fall and the greater the wind pressure on the wall. Ignoring these numbers invites non-compliance notices from the local authority.
When you are planning a G+2, mark the parapet at 3.8 ft (115 cm) on the drawing. If you later decide to add a terrace garden, the extra height will save you from re-doing the coping and waterproofing later.
Thickness choice - 4.5 inch vs 9 inch
A 4.5 inch (115 mm) thick parapet is enough for a plain brick or concrete block wall that only carries its own weight and a light railing. Use it on a G+1 where the roof slab is 125 mm thick and the live load is under 0.75 kN/m2. A 9 inch (230 mm) thick wall is a different beast - it can take a steel balustrade, a small green roof, or even a 150 kg water tank on top. In coastal zones we often go for 9 inch with epoxy-coated rebars because the extra cover plus the larger section offsets chloride attack.
Cost difference is not huge: a 4.5 inch brick wall needs about 6 bags of cement per cubic metre, while a 9 inch RCC wall consumes roughly 10 bags. The material cost gap per running foot is roughly Rs. 120-150, which is nothing compared to the expense of fixing a failed waterproofing later.
Reinforcement detailing you cannot ignore
Vertical reinforcement: 8 mm or 10 mm TMT bars placed at 200 mm centre-to-centre, anchored into the roof slab with a 150 mm development length. Horizontal distribution steel: 8 mm bars at 150 mm c/c, tied to the verticals with 100 mm hooks. Keep a clear cover of 20 mm to protect against corrosion. Use M20 grade concrete (target 28-day strength 20 MPa) for the parapet core. For a 200 sq ft (~18.6 m2) wall, a typical bill of quantity is:
- Concrete: 0.23 m3 ~ 12 bags of 50 kg cement
- Sand: 0.35 m3
- 8 mm vertical TMT: 12 kg
- 8 mm horizontal TMT: 8 kg
- Water-proofing membrane: 45 sq ft
These numbers are from a recent project in Pune where we used Tata Tiscon bars at Rs. 7 per kg. The total material cost came to about Rs. 28,000 for the 200 sq ft parapet.
Brick vs RCC vs steel railing vs glass balustrade - detailed comparison
| Aspect | Brick Parapet (4.5") | RCC Parapet (9") | Steel Railing | Glass Balustrade |
|---|---|---|---|---|
| Initial cost (Rs./ft) | 120-150 | 250-300 | 350-400 | 500-600 |
| Maintenance (per yr) | Rs. 5-10 | Rs. 8-12 | Rs. 12-20 (paint) | Rs. 25-35 (cleaning) |
| Life expectancy | 30-40 yr | 50-60 yr | 25-35 yr (corrode) | 40-50 yr (tempered) |
| Thermal comfort | Good (mass) | Excellent (insulated) | Poor | Neutral |
| Typical use case | Low-budget G+1 | G+2 with roof garden | Modern facade, low load | Luxury apartments, view decks |
Bottom line: if you are on a tight budget, brick wins. If you need a strong base for a green roof, go RCC. Steel railing is cheap but will rust in salty air unless you pick HDG or epoxy-coated bars. Glass looks slick, but the upkeep can burn a hole in your pocket.
Coping design - how to finish the top
The coping sits on the parapet and sheds water away from the wall. A 75-100 mm wide lean concrete strip, mix 1:2:4, works fine. Provide a drip-course groove of 10 mm depth at the outer edge to break surface tension. The slope of the coping should be 1:50 (2 cm drop per metre) towards the drainage point. Use a 12 mm thick steel angle at the inner edge for extra rigidity if the parapet is over 9 inch thick.
Typical quantities for a 100 ft coping: concrete 0.12 m3, reinforcement 4 kg of 12 mm steel, and a labour charge of Rs. 350 per ft. The total cost hovers around Rs. 1,200 per running foot, which is a small price for protecting the wall from water ingress.
Waterproofing - three-step system you can trust
Step 1: Primer - a polymer-modified cementitious primer at Rs. 25 per sq ft (Sika Primer-300). Apply 0.5 mm thick, let it cure 24 hrs. Step 2: Bitumen sheet - self-adhesive SBS modified sheet, Rs. 45 per sq ft (Fosroc Bitumen-Sheet-10). Overlap joints by 150 mm and seal with hot-melt. Step 3: Liquid polyurethane membrane - spray at Rs. 75 per sq ft (Sika PU-200). This gives a seamless top coat that can stretch up to 5 % without cracking.
Overall spend per square foot is Rs. 120-150. In a 200 sq ft parapet the total waterproofing bill will be Rs. 24,000-30,000. Skipping the liquid PU layer is a mistake we see in villages; the bitumen alone cracks within a year under thermal cycling.
Damp proof course (DPC) at the base
Lay a 50 mm thick M15 plain cement concrete strip right at the roof-to-parapet junction. Add 2 % of a waterproofing admixture such as Sika-Water-Guard. The strip acts as a barrier against capillary rise. Reinforce it with a 6 mm steel mesh at 150 mm c/c to avoid cracking under differential settlement.
The material cost is roughly Rs. 90 per sq ft of DPC, labour about Rs. 35 per ft. For a 150 ft long parapet the DPC will cost Rs. 18,750 total - a small line item that prevents massive repair bills later.
Expansion joints - where and how
Place an expansion joint every 3-4 m along the parapet length. Cut a 10 mm gap, fill it with a backer-rod (closed-cell foam) and seal with a bitumen-based sealant (Sika-Seal-100). The joint allows the parapet to expand and contract with temperature swings, especially in Delhi where day-night swings reach 20 °C.
Each joint costs about Rs. 250 including material and labour. For a 300 ft parapet you will need 8-9 joints, adding roughly Rs. 2,200 to the budget. Forgetting this step is a classic mistake that leads to cracking and water seepage.
Five common mistakes and their cost impact
- Undersized height - building 800 mm instead of 900 mm may save Rs. 500 but invites legal trouble and may cause insurance claim denial.
- Inadequate reinforcement - using 6 mm bars instead of 8 mm can reduce material cost by Rs. 300 per ft but typically leads to cracking, costing Rs. 5,000-10,000 in repairs per 100 ft.
- Skipping the drip-course - saves Rs. 150 per ft initially, but water will cling to the parapet, causing rust and spalling that can cost Rs. 8,000-12,000 to rectify.
- Using plain cement mortar for coping - cheap, but under thermal stress it cracks, leading to water ingress. Repair cost averages Rs. 2,000 per crack.
- No expansion joint - saves Rs. 250 per joint, but the resulting stress can cause the parapet to split, costing Rs. 15,000-20,000 for a full rebuild.
These errors add up quickly. A disciplined builder will spend the extra few thousand rupees up front and avoid the headache later.
Cost breakdown for different parapet lengths
| Running feet | Cement bags (50 kg) | Sand (m3) | TMT (kg) | Coping concrete (m3) | Waterproofing (Rs.) | Labour (Rs.) | Total (Rs.) |
|---|---|---|---|---|---|---|---|
| 50 ft | 6 | 0.18 | 12 | 0.04 | 6,000 | 7,500 | 45,000 |
| 100 ft | 12 | 0.35 | 24 | 0.08 | 12,000 | 15,000 | 92,000 |
| 200 ft | 24 | 0.70 | 48 | 0.16 | 24,000 | 30,000 | 180,000 |
| 300 ft | 36 | 1.05 | 72 | 0.24 | 36,000 | 45,000 | 280,000 |
Numbers assume 4.5 inch brick parapet with M20 concrete, Tata Tiscon bars, and Sika waterproofing. Add 10-15 % contingency for site variations.
Construction sequence - ten practical steps
- Mark the parapet line on the roof slab using a steel tape and chalk.
- Excavate a 150 mm deep trench for the DPC, compact, and place the 50 mm M15 strip with waterproofing admixture.
- Lay the first course of bricks or formwork for RCC, ensuring 20 mm clear cover.
- Insert vertical TMT bars, tie them to the slab with 150 mm hooks, and secure with chairs.
- Place horizontal distribution steel at 150 mm c/c, weld or tie to verticals.
- Pour M20 concrete in layers, vibrate, and finish to the required height.
- After curing 7 days, install the coping strip - lay the lean concrete, embed the steel angle, and finish with the drip-course groove.
- Apply primer, bitumen sheet, and liquid PU membrane in the three-step waterproofing system.
- Cut expansion joints, insert backer-rod, and seal with bitumen sealant.
- Final inspection, clean the site, and hand over the parapet with a maintenance schedule.
Climate-specific tweaks
Coastal zones (Mumbai, Kochi) face chloride attack. Use epoxy-coated rebars (Rs. 12 per kg) and a 25 mm extra cover. Desert areas (Jaisalmer, Bikaner) experience high temperature swings; increase cover to 25 mm and use a silicate-based waterproofing admixture. Himalayan belt (Dehradun, Shimla) gets heavy rainfall; apply a double waterproofing layer - primer + bitumen + PU + an extra bitumen sheet - raising the waterproofing cost to Rs. 180-200 per sq ft.
These adjustments add 5-10 % to the material cost but extend the service life by at least 15 years. Skipping them is cheap now, expensive later.
When to call a structural engineer
If your house is G+2 or higher, the parapet bears not just its own weight but also the lateral load from wind and possible rooftop equipment. A structural engineer will calculate the exact reinforcement, check the slab-to-parapet connection, and ensure compliance with IS 456. For a simple G+1 with a brick parapet you can get away with a competent site engineer, but once you cross two storeys, the risk of collapse without proper design skyrockets.
Our firm has helped over 500 homeowners avoid that risk. The fee for a basic parapet design is Rs. 8,000-12,000, a small price compared to a potential structural failure.
Related reads
Related: Wall Thickness for House Construction in India 2026 - 9 Inch vs 4.5 Inch
Related: Construction Joints and Expansion Joints in RCC House Construction 2026
Related: Slab Thickness for House Construction in India 2026 - RCC Design Guide
Bottom line recommendation
For most Indian homes built today, a 4.5 inch brick parapet with 8 mm vertical and horizontal reinforcement, a 75 mm lean concrete coping, and the three-step Sika/Fosroc waterproofing system gives the best bang for the buck. Raise the thickness to 9 inch and upgrade the reinforcement only when you have a roof garden, heavy equipment, or harsh coastal conditions. Stick to the code-mandated heights, never skip the DPC or expansion joints, and bring a structural engineer on board for anything above two storeys. Follow the sequence above and you'll have a parapet that lasts decades without bleeding money.