
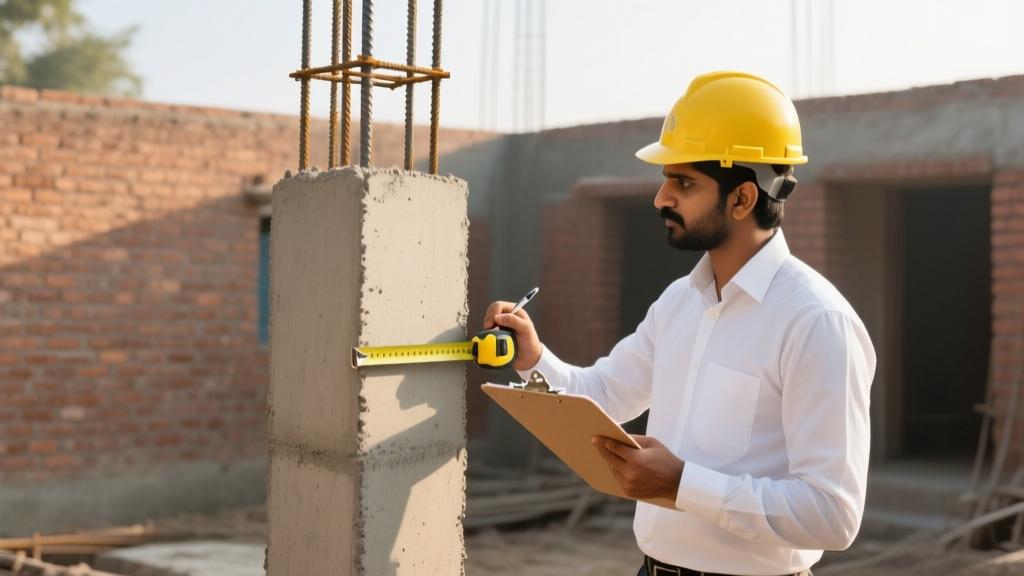
Why you must stop paying on a handshake
Most builders in Tier-2 and Tier-3 towns still think a verbal nod is enough to release a cheque. In reality the moment you hand over Rs. 2-3 lakhs without proof, you hand the contractor a weapon. The moment the foundation cracks a year later, the bank will ask for receipts you never got. The only way to keep the money from disappearing is to tie every rupee to a physical inspection.
Stage-wise inspection checklist
Break the project into logical milestones. The common Indian practice is:
- Foundation (excavation, footing, reinforcement, concrete pour)
- Plinth and ground-floor slab
- First-floor slab and column work
- Plaster & brickwork
- Finishing (tiles, paint, fixtures)
At each milestone pause the work, walk the site, and verify the items listed below. Anything missing or looking off-spec must be rectified before you sign a stage-completion certificate.
Foundation
- Check excavation depth with a measuring tape. The approved drawing will say 1.2 m, 1.5 m, etc. Any deviation >10 mm is a red flag.
- Inspect the reinforcement. Use a steel gauge or a simple nail-file to feel the bar diameter. TMT bars marked "TMT-500" should read 12 mm for a 10 m² footing. If you see 10 mm bars, contractor is cutting corners.
- Verify bar spacing. A 200 mm centre-to-centre spacing is typical for 150 kPa soil. Count a few bars across 1 m and calculate.
- Ask for the concrete mix design slip. The mix should be M20 (1:1.5:3) for most residential footings. If the slip shows "C-20" but the slump is 10 mm, suspect dilution.
- Take a core sample or a 150 mm cube from the first pour. Send it to a reputable lab (e.g., IIT Madras Lab, Delhi Metro Lab). The 7-day compressive strength must be at least 70 % of the 28-day target.
Plinth and slab
- Level the plinth with a water level or laser level. Unevenness >5 mm over 3 m is unacceptable.
- Measure slab thickness with a steel rule. A 150 mm slab should not read 130 mm.
- Check the reinforcement mesh. For a 150 mm slab, 12 mm TMT bars at 150 mm centres are standard. Look for missing stirrups.
- Inspect formwork for gaps. Water seepage during the pour indicates poor shoring.
- After curing, test a 150 mm cube from the slab. 7-day strength should be >12 MPa for M20 concrete.
Plaster & brickwork
- Tap the brick with a hammer. A solid "ding" means good bonding; a hollow thud signals missing mortar.
- Measure plaster thickness with a ruler. Minimum 12 mm for external walls, 10 mm for internal.
- Check for vertical cracks within 48 hours of plastering. Early cracks often mean the mix was water-rich.
- Verify the sand-cement ratio on the mix slip. A 1:4 ratio for plaster is typical; anything richer points to cement dilution.
Finishing
- Lay a tile in a hidden corner and walk on it. If it gives, the mortar bed is weak.
- Check paint gloss with a simple finger-rub test. Dull finish after 24 hours means low-grade paint.
- Run water through the plumbing fixtures. Any drips after 15 minutes of running water indicate poor joint sealing.
- Inspect the final coat of putty. It should be sanded smooth; any visible brush marks reveal rushed work.
When you are satisfied, sign a Stage-Completion Certificate. The document must list:
- Project name, location, and contract number.
- Date of inspection and name of the person signing.
- Detailed list of items checked and their status (OK / Not OK).
- Reference to the approved drawings and any deviations.
- Signature of the contractor and the homeowner (or the authorized representative).
Common contractor fraud patterns and how to catch them
After two decades of site visits, I can name the five tricks that cost homeowners lakhs.
| Fraud | What it looks like | How to detect |
|---|---|---|
| Short-pour concrete | Contractor mixes 10 % less cement than stated. | Take a fresh concrete sample, test slump and compressive strength at 7 days. |
| Undersized rebar | Using 8 mm bars instead of 12 mm in footings. | Measure bar diameter with a caliper or a simple nail-file. |
| Fake cement bills | Submitting a bill for 50 bags while actually using 40. | Ask to see the cement bags and the delivery challan on site. |
| Ghost labour | Charging for 10 masons, only 6 show up. | Do a head-count at random times; check daily attendance sheets. |
| Cement dilution | Adding river sand or fly ash to cement without disclosure. | Check the mix slip for water-cement ratio; lab test for chloride content. |
Short-pour concrete is the most common fraud. Contractors love to save a few bags of cement and claim the same strength. The 7-day cube test will expose it every time.
7-day and 28-day cube test process
Take three 150 mm cubes from each major pour (foundation, slab, roof). Label them with date, location, and mix design. Send them to an ISI-certified lab within 24 hours. The lab will cure two cubes in water at 20 °C and keep one in air for the 7-day test.
- 7-day strength should be at least 70 % of the 28-day target (e.g., 12 MPa for an M20 mix).
- If the 7-day result is lower, demand a retest after a fresh pour.
- 28-day test confirms the final strength. Do not release the final retention money until you have the certificate.
Most Indian labs charge Rs. 1,200-1,500 per cube. For a typical 1,500 sq ft house you will spend about Rs. 15,000-20,000 on testing - a small price compared to a future settlement.
Why milestone payments are a trap
Paying Rs. 30-40 % of the total contract at the foundation stage feels normal, but it gives the contractor a huge cash cushion. If the work stalls, you have already handed over enough money to buy new materials and walk away.
My experience shows that contractors who receive more than 20 % of the contract value before the first slab often disappear after the foundation is cured. The safest route is:
- Sign a contract with a Retention Money clause of 10 % of each milestone.
- Release 90 % of the milestone amount only after you sign the Stage-Completion Certificate.
- Hold the 10 % retention until the 28-day cube test is handed over and the final snags are cleared.
Retention money is not a penalty; it is your use. If the contractor fails to meet the quality, you can deduct from the retained sum.
How to write a stage-completion certificate
Keep the language simple. A sample template:
Stage-Completion Certificate

Project:   ________________________
Location:  ________________________
Contract No.: ____________________

Date of Inspection: _______________

Works inspected:
- Foundation excavation depth: __________ mm (as per drawing)
- Reinforcement size & spacing: ________
- Concrete pour volume: __________ m³ (mix M20)
- 7-day cube strength: ________ MPa (minimum 12 MPa)

Status:   [ ] OK   [ ] Not OK (specify)

Remarks: ________________________________________________

Signature (Homeowner/Authorized Rep): ___________________
Signature (Contractor): _________________________________
Both parties must sign on the same day. Keep a scanned copy in your cloud storage and a printed copy in the site office.
Retention money strategy
Retention should be split into two parts:
| Phase | Retention % | Release Condition |
|---|---|---|
| Foundation | 5 % | After 7-day cube test and no cracks in footing. |
| Superstructure | 5 % | After 28-day cube test and plaster inspection. |
| Finishing | 5 % | After all snags cleared and final handover. |
Do not agree to a "single retention" of 5 % for the whole project. Split it, so you always have money on the table until the last quality check.
The role of a third-party site engineer
Hiring an independent engineer adds a layer of accountability. The engineer's duties are:
- Verify material bills against delivery challans.
- Supervise concrete pours and take cube samples.
- Issue a written inspection report after each milestone.
- Advise on corrective actions if any test fails.
Fees for a competent site engineer in Delhi-NCR range from Rs. 8,000-12,000 per day. In smaller towns you can negotiate Rs. 3,000-5,000 per day. The cost is recouped the moment you avoid a Rs. 5-10 lakh dispute.
What to put in writing before work starts
A contract without a detailed annexure is a recipe for arguments. Include these clauses:
- Exact mix design for each structural element (M15 for footings, M20 for slabs, etc.).
- Brand and grade of cement (e.g., OPC 43 grade, brand: ACC, Dalmia).
- Reinforcement grade and size (TMT-500, 12 mm for footings, 10 mm for lintels).
- Delivery schedule of materials with penalties for late delivery.
- Inspection rights: homeowner or appointed engineer can inspect any time.
- Cube testing requirement: 3 cubes per pour, 7-day and 28-day results mandatory.
- Retention clause as described above.
- Dispute resolution: arbitration in Mumbai Commercial Court.
Never rely on verbal promises about "good quality" or "no hidden costs". Write it down, get both signatures, and keep a copy in a safe place.
Practical tips you can start today
- Buy a cheap steel gauge (Rs. 250) and start measuring rebar yourself.
- Ask the contractor for the original cement delivery challan and verify the seal.
- Take a photo of every pour, every batch of cement, and every box of bricks. Photo evidence is invaluable if a dispute arises.
- Set a reminder on your phone for the 7-day and 28-day test dates. Do not let the lab report sit idle.
- Talk to neighbours who have built recently. Their experience with local contractors can save you from a bad hire.
In my 20-year career, the only thing that consistently protects a homeowner is disciplined, documented inspection. The moment you skip a single check, you give the contractor a loophole to cut corners. Follow the stage-wise checklist, demand cube tests, hold retention, and you'll walk away with a house that doesn't crack under the first monsoon.
Related: Construction Quality Inspection Checklist for Homeowners 2026
Related: Concrete Curing Methods, Duration & Mistakes in Indian Homes 2026
Related: How to Choose the Best Cement for Home Construction 2026